Just for fun... click:
|
|
Just for fun... click:
|
| Welcome | About Us | Services | Products/Freebies | Resources | Support | Contact Us |
|
"Perfect is the enemy of good" -Voltaire, Aristotle, Confucius, and your humble consultant! |
FileMaker Classic Theme to Custom ThemeThis page is a work in progress. Use any information posted here as a starting point, test carefully, and use at your own risk. You can watch a video walk though of Themes, Styles, and this blog post as part of our DIGFM: Deepen your relationship with the FileMaker Platform (2/14/2019; Santa Clara, CA) presentation starting 53:30 in Every solution created in FileMaker 11 and before, will on conversion to .fmp12 file format, have layouts that are all based on the Classic Theme. The ability to use awesome Custom Themes is available to everyone running FileMaker 13 and above. What is the best way to convert from the Classic Theme to a Custom Theme with minimal effort? This post is a bit on the long side. We expect that it will be worth the time to read for the many who dare to do so! First some definitions:
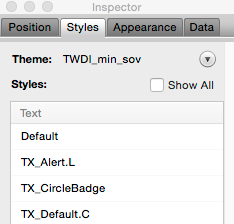
A Theme is a collections of Styles.
You can use a Custom Theme to:
There are at least 2 ways to convert Layouts from the Classic Theme to a Custom Theme: (The immediate goal is to have a layout that looks the same as before, but is now “sitting” on top of a Custom Theme. You can then, either immediately, or over time, take advantage of your Custom Theme & Styles.) Method B)
This method has the obvious disadvantages that it requires you to fix the tab order and do more work. Method A (AKA the single undo method)
Method A will either...
...depending on how you set up your Custom Theme...
Your Custom Theme should be designed with at least 2 goals in mind:
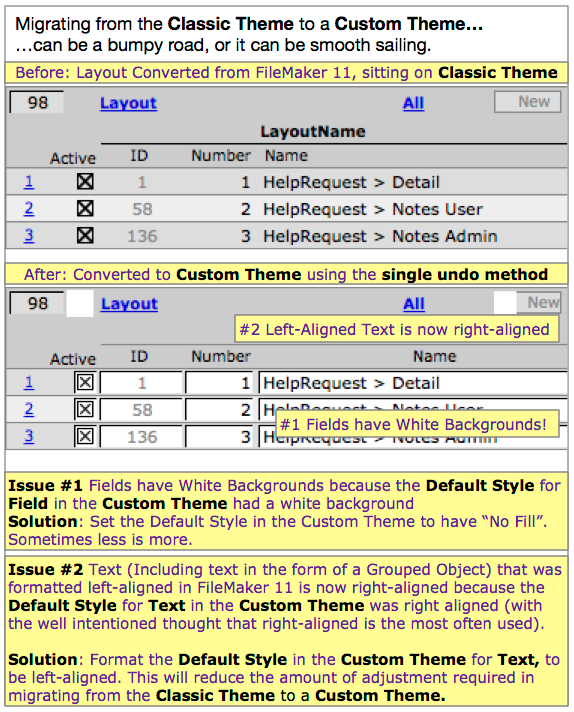
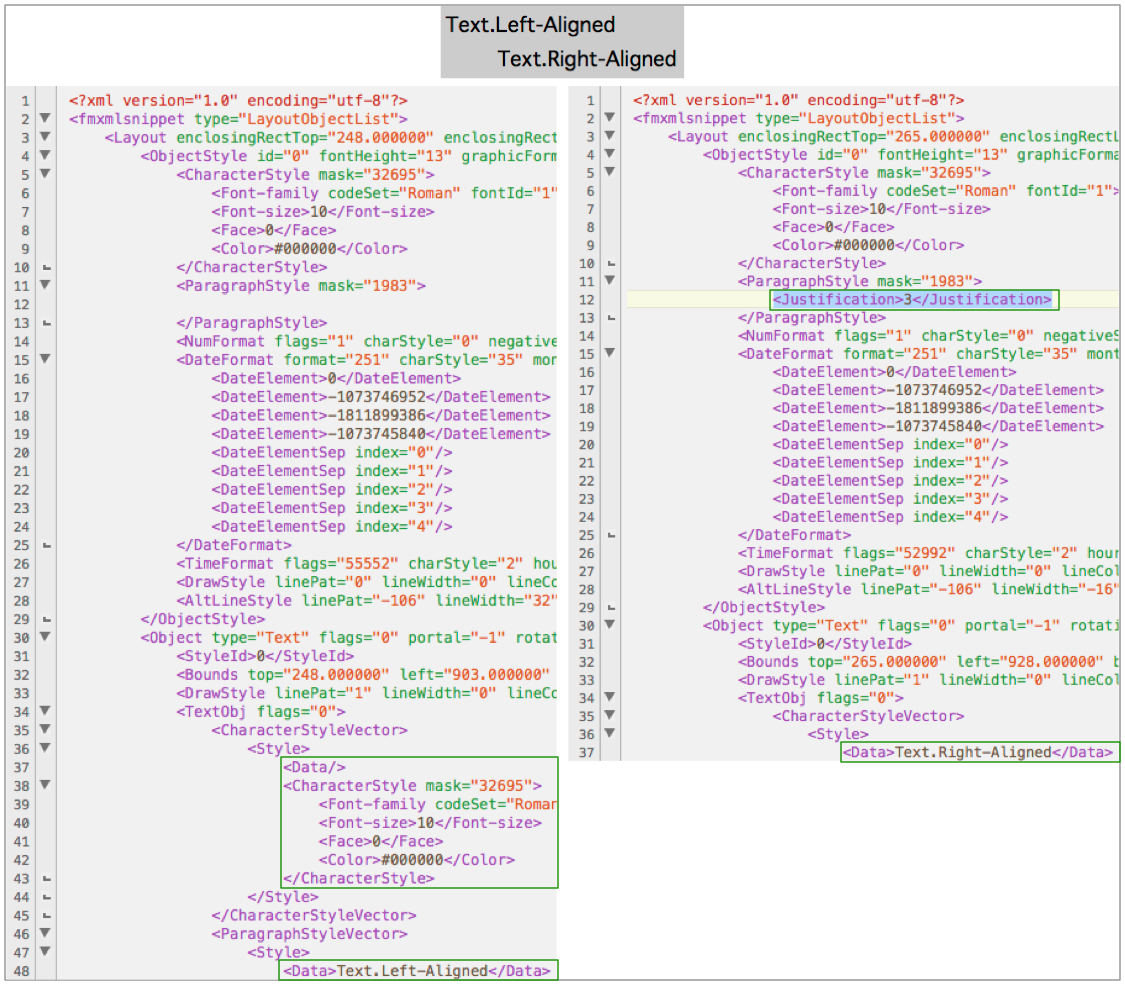
In many cases, the 2nd goal takes priority over the first goal. Let us proceed with that as our use case. In that use case, the design of our Custom Theme needs to be informed by the built in design of the Classic Theme. Some background... It is useful to understand what formatting choices the Classic Theme makes for the default style, for each layout object type (text, layout_field, etc.): Lets us look at Layout_Text: Classic text defaults to Left Aligned. If you want to verily this, copy a Layout_Text to the clipboard and convert it to text (many people use the BaseElements Plugin for this), or take our word on it. You will want the Custom Theme Default Style for Text to match the Classic Theme formatting choices. This will help you migrate from the Classic Theme to a Custom Theme with the least amount of effort. There are technical reasons for this that go beyond the scope of this post.
Below is an image showing the same 2 layout objects (left aligned and right aligned) sitting on top of the Classic Theme (after the File has been converted to FileMaker .fmp12 format).
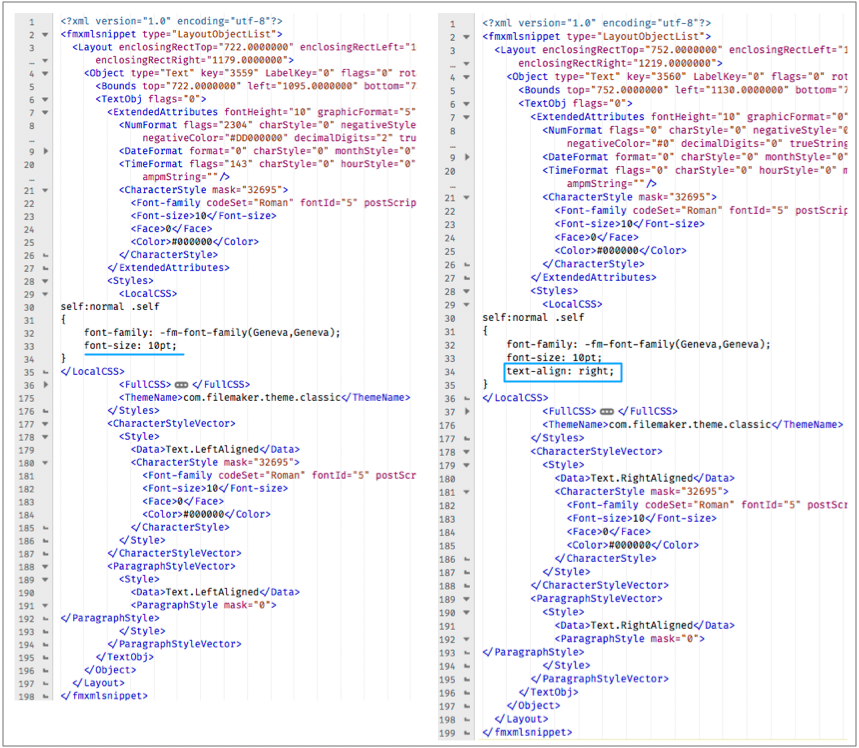
This analysis should be done for each layout object type: Text, Edit Box, Portal, Etc. The rule seems to be that any property that is NOT defined in the Classic Theme will not be automatically defined when you switch to a Custom Theme. Here are the Default Style properties that we used in our custom theme "sitting on top of the Minimalist Theme" for Text and Edit box
Side note 1a: A transparent fill is useful when you are placing fields on list view or in portals that have zebra striping implmented. Side note 1b: FileMaker 12 and up have 2 ways to create a transparent fill Side note 2: Buttons were introduced in FileMaker 12. What!? Before that we had “buttons” that are really “grouped objects”. You can see the difference between the 2 types of “buttons” in the user interface and also by comparing the XML. This knowledge will help you plan strategy for making the transition from Classic Theme to Custom AND (over time) from “grouped object buttons” to “real buttons”. When you use the single undo method, all of your layout objects will be attached to the Default Style of your Custom Theme and will have local formatting based on the local formatting from FileMaker 11. You want to make sure that your Default Style for each object type and your local formatting combine well without conflicting. This might be the most important take away/gotcha. If you build your Custom Theme strategically your migration from the Classic Theme to a Custom Theme will be relatively easy. Resources Converting from the Classic Theme Part 1: The Guts http://www.designingfilemaker.com/2015/10/10/converting-from-the-classic-theme-part-1-the-guts/ Very good article and it also has lots of good links... DevCon 2014: Real World Theme & Style Planning - Bob Shockey https://community.filemaker.com/videos/1516 Under the Hood: FileMaker Layouts - session from FileMaker DevCon 2017 http://www.filemaker-fanatics.com/fm_devcon2017/int001_under-the-hood_filemaker-layouts.php This blog post is an evolving document built on information from the community and made better by contributions from many. Free to give us feedback in the comments section here. Some useful links:
Thanks to all those who helped make this info-graphic better. Remaining errors are ours. Here are some of the people who shared useful suggestions (listed alphabetically):
If you have any questions, please feel free to contact us. Thanks. |
| Welcome | About Us | Services | Resources | Products/Freebies | Support | Contact Us |
| © 1998-2024 Tony White Designs, Inc. |